How to Build a Fieldstone Wall Without Mortar
I am an online writer with a degree in journalism who writes on a wide range of topics.
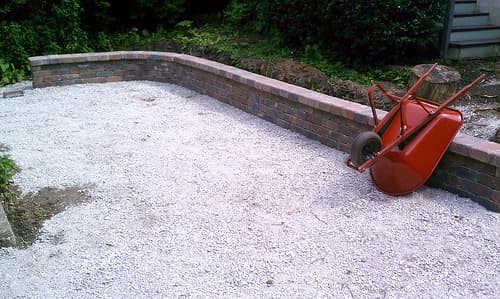
This article will guide you through the process of building your own retaining wall step-by-step.
"The Wall" by Machine is Organic via Flickr
What is a Retaining Wall?
A retaining wall holds back earth materials such as rock, sand, dirt, and even water, and keeps them in place to prevent erosion or displacement. Retaining walls are usually made of stone, brick, vinyl, steel, metal, concrete, or wood. Railroad ties were once used, but they have been abandoned due to environmental concerns. While one-piece concrete or wood walls used to be most popular, segmental walls are used more often because they're cheaper, easier to build, and more environmentally friendly.
The most important thing to remember when building a retaining wall is the lateral earth pressure—it should be the smallest at the top because the wall could move and be ineffective otherwise.
Thanks to guidance from Truevalue, we can see how to go about building a retaining wall step-by-step!
Materials You'll Need
- Long-handled shovel
- 2-foot level, pickaxe, mattock (digging tool), and digging bar, as needed
- Carpenter's or framing square
- Tape measure
- Retaining wall system block
- Wooden stakes
- Work gloves and heavy work boots
- Mason's twine
- Back support
- Line level
- Brick chisel
- Wheelbarrow
- Hand-drilling hammer
- Crushed stones
- Torpedo level
- Tamper (rental item)
- Geogrid reinforcement
- Long straightedge (a straight 2 x 4)
How to Build a Retaining Wall
- Excavate and Lay Out: Dig out a wide, level area where the wall will be, and grade the area on the downhill side of the wall. Drive the stakes a few inches into the downhill side. Stretch a level Mason's twine between the stakes about 6 inches above the grade. Attach a line level over the string, and move one end of the string up or down as needed.
- Excavate Footing Trench: Dig an 18-inch-wide, 6-inch-deep trench on the uphill side of the line. Fill the trench with crushed stones and rake it so it is level. Then use a tamper (you may want to rent this) to compact the stones. Place a 2 x 4 straightedge on edge, and place a 2-foot level on it to make sure the gravel footing is level. Tip: If you want a gently curving wall, lay down a garden hose or length of rope to guide your excavation instead of stakes and string.
- Lay the First Course: Put the first concrete unit on the stones a measured distance from the string. Use a torpedo level to make sure that the block is level. Put the remaining block for the first course, using a 2-foot level to make sure the stones are level and in line with each other. Caution: Wear heavy work gloves and sturdy boots to protect your hands and feet. Be careful when lifting heavy stones—always bend at the knees and use your legs, not your back, to lift. You may want to buy an elastic back support for added support.
- Cut a Starter Block: Stagger the vertical joints by cutting the first block in the second course (and in every other even course: fourth, sixth, etc.) in half. Use a brick chisel and a hand-drilling hammer (small sledge) to mark the block where you will cut. When the block is marked completely, it will break on the line.
- Lay the Second Course: Put the block for second course on top of the first one, beginning with the half block. You usually want the wall to slope backward 1 inch for every 12 inches of height.
- Backfill as You Lay Block: Backfill and tamp the soil behind the wall as it rises. Reinforce the earth behind the wall with a layer of geogrid as you do this. Repeat Steps 5 and 6 for the next courses.
- Complete Final Grading: Fill the trench on the downhill side of the wall with tamped crushed stones and spread topsoil up to the wall. Add topsoil on the backside of the wall until it is a few inches from the top. The grade behind the wall should be level or slope down for at least a few feet.
- Plant and Enjoy! Spread mulch, sow seed, lay sod, and plant your garden—or lay your patio—and enjoy.
Note: This was written by Roy Barnhart, a home improvement expert in Fairfield, CT.
This article is accurate and true to the best of the author's knowledge. Content is for informational or entertainment purposes only and does not substitute for personal counsel or professional advice in business, financial, legal, or technical matters.
Mike on April 26, 2016:
Great article and tips regarding retaining walls. We have been in the business of installing walls for several years here in Pittsburgh. We also have some photos if you would like to view them at http://brkcustomconcrete.com/
Terrie@Basalite on January 08, 2013:
One important safety step to add...calling 811, a free service, that will help you ensure that you do not accidentally cut into service lines. This is not only a safety issue, but it could cost you big money if you accidentally cut a line (not to mention saving you from the angry neighbors that just lost a utility because you cut the line)!
There's more info about 811 here, and some additional retaining wall info that might be helpful to you: http://info.basalite.com/blog/.
Best of luck, Happy Building!
Terrie@Basalite
Read More From Dengarden
K SRINIVAS JAGAN on June 08, 2012:
I have to construct RCC retaining wall of hight about 24 meters for retaining eEarth in lateral direction. Can any body healp me by providing any already made design with excel sheet.
thanq.
louromano on March 21, 2012:
Very well written hub . Thanks.
carolinemoon on October 18, 2011:
Very nice hub, thanks for the information.
STEELER99 from RI/NY on September 05, 2011:
Mine is 6ft long. I have been building it for close to 3 months. I work on it 14 hours a day. I am not even close to being done. I have not taken a day off since I started this project. Had I known it would take so long to build, I would have never started it.
Northface jackets on August 11, 2011:
Everyone loves what you guys are up too. This sort of clever work and reporting! Keep up the great works guys I've included you guys to my blogroll.
toddclayton from Birmingham, AL on July 26, 2011:
Any Time you need anything let me know.
glassvisage (author) from Northern California on July 25, 2011:
Todd, thank you for your comment and for this information!
toddclayton from Birmingham, AL on July 21, 2011:
glassvisage, Thanks for putting this on your hub. I have been in the SRW industry for about 8 years now and do see something that is typically misunderstood by homeowners and do-it-yourself types. I have been part of many types of SRWs both tall and small. The directions that you have given are great for anything that is below 2' in height. You do not need a standard 6" thick base with such walls and you can backfill with little gravel. I will say this to one of your commenters, Weep holes are not required in Segmental Retaining Walls due to the fact that they are to naturally weep out the face of the wall. It is always wise to use a gravel backfill to ensure this happens. I have a hub and will be writing on the standard set forth by the NCMA on SRWs at a later time. Thanks.
Mini Greenhouse on April 13, 2011:
Great hub thanks for taking the time to put it together, the pics help explain the process a lot too. A rated work! Cheers
George Daily on January 27, 2011:
This is a great hub. I have recently started doing up my garden and was interest how to go about creating a retaining wall. I will soon be updating my Home and Garden website if anyone would be interested in having a look at it.
craigmissuea from USA on January 01, 2011:
Retaining wall is of great use and there is no doubt about it. You have explained how to built it in a clear and nice manner.
parkersarah8415 from USA on October 17, 2010:
Hi, glassvisage. The drawings are really useful as each step is visualised. Thank you!
Wooden Greenhouse Guy on August 26, 2010:
Hi, this is a really helpful hub. I love the images too, they seem to really clarify each point. I'd like to build a retaining wall in my split level garden but I thought Id best pay somebody to do it, now I'm thinking maybe not!
glassvisage (author) from Northern California on August 23, 2010:
Thank you all for your comments! I hope this was helpful :)
nike shox oz on August 19, 2010:
I am not much into reading, but somehow I got to read nice information on your site. Simple to understand and helpful. We will look forward for your future updates.Thanks!
Richard Stephen on July 23, 2010:
Nice hub! Many people recommend you also lay down some adhesive between the courses as you go up. It adds to the strength and stability of the result.
Peter on July 16, 2010:
I have to build a retaining wall where I have had to remove approx. 1000 tons of soil. I intend to use "GABIONS". I was also considering using shuttered concrete as opposed to laying concrete blocks flat for the height, which by the way is approx 18 foot.
glassvisage (author) from Northern California on June 13, 2010:
Thank you for your comments!
adorababy from Syracuse, NY on June 01, 2010:
The main drawback to the pre-cast stones is they shouldn't be used in applications where the wall height is more than 3 feet.
Andrew on June 01, 2010:
It doesn't matter if you quote a resource it is still plagiarism if you copy it verbatim.
Barry Rutherford from Queensland Australia on April 07, 2010:
Just what I need :)
glassvisage (author) from Northern California on April 06, 2010:
Yeah... I don't think it'd try it myself either :) Thanks for dropping by!
RamonB on March 30, 2010:
This has been very useful, I need to build a retaining wall in my garden, and your hub has convinced me that I really need to hire a professional :-)
Ramon
Vachtra on March 17, 2010:
I hate to be the bringer of bad news but the design shown here has very limited use. The weep holes mentioned before are vital for any wall over three feet high. There also needs to be a support anchor for higher walls that go several feet into the earth horizontally from the wall so that it acts more like part of the earth instead of just a wall holding up dirt.
For anything over two feet tall I highly recommend hiring a structural engineer. They not only have the training to design the wall but will also be able to tell you what is best in your area to reduce costs. The last thing you want is to have your wall cave in on someone as they pass by and that would be the most likely time for it to cave since there could be extra force on the wall from leaning or pressing on the wall.
Another benefit is liability. If you design your own wall and it fall and injurs someone then you are liable for their injury. If the wall is professionally designed and built to specifications then the designer is liable. Of course if it is not built to specifications then the builder is liable either you or a contractor if you hired one.
ciidoctor on November 20, 2009:
useful info thnx
Derek James from South Wales on October 02, 2009:
Your good advice should go well with my wall building hub, si I shall link to it. Well done.
Sexy jonty from India on September 21, 2009:
Very well written hub .....
very much informative ......
Thank you very much for your great hub, for good advice, good wishes and support. Thanks for sharing your experience with all of us.
glassvisage (author) from Northern California on July 01, 2009:
Thanks for your point of view, John... I'm sure that building retaining walls should mean taking into account different geographical conditions!
John on July 01, 2009:
Are you not concerned about drainage near the footing? I have been told that if you are laying these types of walls, sand and a good drainage system is imperative to make the wall last. I am up north where the winters easily freeze the ground and freeze - thaw cycles are very strong.
glassvisage (author) from Northern California on October 03, 2008:
Thanks for clarifying... earlier this woman claimed I "stole" her information (which I clearly referenced in the Hub)... and her words were more difficult to misinterpret, I believe. I get so defensive because I hate stealing and especially the thought of being accused of it!
greathub from Earth on October 03, 2008:
Please don't take me wrong. I just asked whether you have made a retaining wall yourself and took snaps of it OR you have taken the snaps from the website. [I can see that you have mentioned doityourself.com in this hub]. Words can have different connotations in different parts of the globe.
glassvisage (author) from Northern California on October 01, 2008:
Thanks you all.
Greathub, I didn't TAKE them. As you can see, I gave doityourself.com credit in the Hub, and it's been there since I created the Hub.
greathub from Earth on October 01, 2008:
nice hub.
have you taken these pictures from doityourself.com?
Fionna from Finland on September 15, 2008:
Wow, what a fascinating hub!
Joanie Ruppel from Texas on March 22, 2008:
This is a thorough set of instructions. This could be a heavy duty version of the raised garden bed construction shown in https://hubpages.com/living/Raised-Garden-Bed-Cons...
How to Build a Fieldstone Wall Without Mortar
Source: https://dengarden.com/home-improvement/How_to_build_a_retaining_wall
0 Response to "How to Build a Fieldstone Wall Without Mortar"
Post a Comment